How to produce a stop-motion video about quantum computing
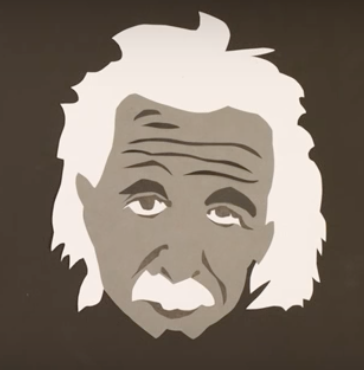
“What are quantum computers and how does playing games help physicist in cutting edge research?” This intriguing question was recently explained in a very elegant YouTube video published by ScienceAtHome.
Crastina got in touch for an interview with one of the creators: Janet Rafner, who is a physicist and scicommer, currently at Copenhagen University, Denmark.
 Hi Janet, tell us a little about yourself and the background of the video project!
I have undergraduate degrees in physics and studio art and for a long time have been interested in the intersection of science and design and how the two subjects could empower and enable each other. After my third year of undergraduate studies, I spent the summer working with the Physics Reimagined research group in Paris with Prof. Julien Bobroff. After that summer I applied for a Fulbright fellowship pursuing new ways to explore complex phenomena in physics through animation, simulation, and gamification.
During the time of my fellowship and my continued graduate studies, I have worked closely with the ScienceAtHome team at Aarhus University, Denmark. A major project there has been gamification of quantum computing. The game had already gone through a few iterations, but they want a means to explain and promote both how quantum computing works and how the game captures useful information. So it was a perfect fit.
Why did you choose the video format and not some other channel?
Animation has immense power to cut through complexity and bring to life physical phenomena that is otherwise very difficult to understand. For the public, it can make seemingly incomprehensible science phenomena concrete, accessible, and relevant to their everyday life. Meaningful content that gives context also elevates the appreciation and recognition of the astounding accomplishments of scientific researchers.
Different animation techniques and intended audiences allow for variety and artistic license. Stop-motion animation, for example, can be used to make complex phenomena in science less intimidating. The medium is ‘constructed’ and the viewer knows intuitively that the author has exercised control in crafting each frame, in effect becoming a storyteller. The types of materials often used in stop-motion, such as paper cutouts, marker board drawings, and clay objects or figures, connote to the viewer, “Don’t worry – we are going to make this as simple as possible and we want you to have fun, too.” The viewer relaxes, understanding that his or her role is to be an audience – to watch the story.
How did you plan your cooperation in the production team?
The team consisted of me, Pinja (a post doc in theoretical physics with a keen eye for graphics and exceptional story telling skills), our PR team helping with cutting pieces and setting up, and the advice of expert film maker Charlotte Arene.
ScienceAtHome is a diverse team of scientists, game developers, designers and visual artists based in Aarhus, Denmark. The team creates fun citizen science games with the aim of revolutionizing scientific research and teaching by game-play.
At the time I created the stop motion, ScienceAtHome had just had a paper accepted to Nature entitled ‘Exploring the quantum speed limit with computer games.’ The paper presents the results from a computer game, “Quantum Moves.”
The stop motion is a short film that explains the story behind quantum moves and tells you the secrets of how your game play can help build a real quantum computer.
Pinja took the lead on writing the script, we tackled the story board together, sketched out different possibilities and then went out to buy all the materials and software needed. I am the voice in the video, and Pinja and I spent many hours recording the audio and running the script over and over again to get the right intonation at the right spots. I said it so many times I still have a good portion of it memorized! We added the music towards the end when I was editing the audio. Charlotte gave some good advice and recommendations and I choose from those recommendations.
What was easier than expected and what was harder than expected?
Writing the script and storyboarding the film was much easier than expected. We had a clear message of what we wanted to convey and were able to put it together. It was a really fun process. Pinja and I had such a good time laughing and coming up with fun ideas of how to convey this complex process. It is so much easier to be creative when collaborating with a kindred spirit.
The post production took much longer than I expected. The whole project in total took about 300 hours, but it was really challenging to edit the audio to fit the story line perfectly. The most inconvenient part of the animation process was dealing with the huge files. A single folder of all the individual pictures was over 100GB. Each time I rendered a new draft of the video, it would take over three hours.
Give three pieces of advice to the early career scientist who intends to do an animation video!
- Know your audience!
- Be prepared to experiment!
- Plan in an extra month longer than you think it will take.
- Claire Price of Crastina receives outreach award from Royal Society of Biology - October 25, 2020
- Agile Science student project at Brussels Engineering School ECAM: “We can’t wait to try it again!” - August 28, 2020
- Create an infographic in the Lifeology SciArt Infographic Challenge - June 16, 2020
- Adam Ruben – The scientist that teaches undergraduate students comedy - March 27, 2020
- Sam Gregson, Bad Boy of Science: “Comedy helps to bridge the gap” - March 10, 2020
- The Coolest Science Merchandise of 2019 - December 16, 2019
- Science Media Centre (UK) offers guide on dealing with online harassment in academia - November 26, 2019
- Agile project management taught to students and researchers at Karolinska Institutet - September 20, 2019
- Stefan Jansson: Improve your credibility! (Crastina Column, September 2019) - September 6, 2019
- The People’s Poet: Silke Kramprich, tech communicator - August 31, 2019


Leave a Reply
Want to join the discussion?Feel free to contribute!